Photographing a solar eclipse is an awe-inspiring experience that requires more than just point-and-click photography. The dynamic range of lighting conditions presented by an eclipse means that automatic camera settings often fall short. Here’s a guide to using manual settings on your camera to capture the eclipse’s breathtaking beauty without compromising your equipment or the final image.
Why Manual Settings?
Automatic settings in cameras are designed for typical scenarios and lighting conditions. An eclipse, with its dramatic changes from bright to near-total darkness and back, can confuse these automatic systems, leading to underexposed or overexposed images. Manual control allows you to adjust for these lighting extremes, ensuring you capture the nuanced details of the eclipse.
Key Manual Settings for Eclipse Photography
-
ISO: Keep it low to avoid noise. An ISO of 100-400 is typically sufficient, especially during the partial phases of the eclipse.
-
Aperture: A smaller aperture (higher f-stop number) ensures a sharper image of the sun’s disk. Aim for an aperture around f/8 to f/16. This setting reduces the amount of light hitting the sensor, helping to prevent overexposure.
-
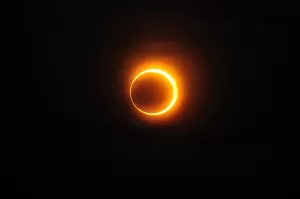
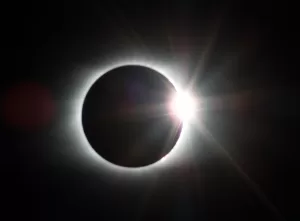
Shutter Speed: The correct shutter speed varies significantly depending on the phase of the eclipse. During partial phases, a faster shutter speed (1/1000 second or faster) can capture the sun’s reduced brightness. As totality approaches, you’ll need to decrease the shutter speed (1/60 to 1 second or longer) to capture the corona’s fainter light.
-
Focus: Auto-focus can struggle with the low contrast and brightness of an eclipse. Switch to manual focus and set your lens to infinity. You may need to adjust this slightly to find the sharpest focus for your particular lens.
-
White Balance: Set your white balance to ‘Daylight’ to preserve the natural colors of the eclipse. Auto white balance might neutralize the dramatic colors, especially during totality.
Practice Before the Eclipse
Familiarize yourself with these settings before the eclipse. Practice on the moon at night, as it reflects sunlight similar to the eclipse conditions. This rehearsal allows you to understand how changes in settings affect your images and helps you adjust more confidently during the eclipse.
Additional Tips
-
Bracketing: Since the exact exposure can be hard to predict, consider using exposure bracketing to take multiple shots at different settings. This ensures you capture a wide range of exposures to choose from.
-
Batteries and Memory: Ensure you have extra batteries and ample memory card space. Changing these in the middle of an eclipse can cause you to miss critical moments.
-
Tripod and Remote Shutter Release: A sturdy tripod and a remote shutter release can prevent camera shake, especially during longer exposures.
Conclusion
Using manual settings to photograph a solar eclipse gives you control over the final image in ways automatic settings cannot match. With preparation and practice, you can capture stunning images that convey the awe-inspiring beauty of an eclipse. Embrace the manual labour involved in setting up your camera; the results will undoubtedly be rewarding. And protect your equipment and your eyes with optical filters and eclipse glasses from our Eclipse Essentials shop.